
If you’re really backyard barbecue savvy, you’ve probably grilled a pizza before. If you haven’t, welcome to a new world of outdoor pizza making on a budget! You don’t need a $6,000 wood-fired pizza oven on your patio to get delicious pizza at your next backyard event. You can make pizza on a Weber charcoal grill that’s just sitting in your backyard right now.
With summer coming up, I decided to see exactly what was the best way to make a pizza on a weber charcoal grill. It turns out, there are quite a few ways to make pizza on a Weber charcoal grill!
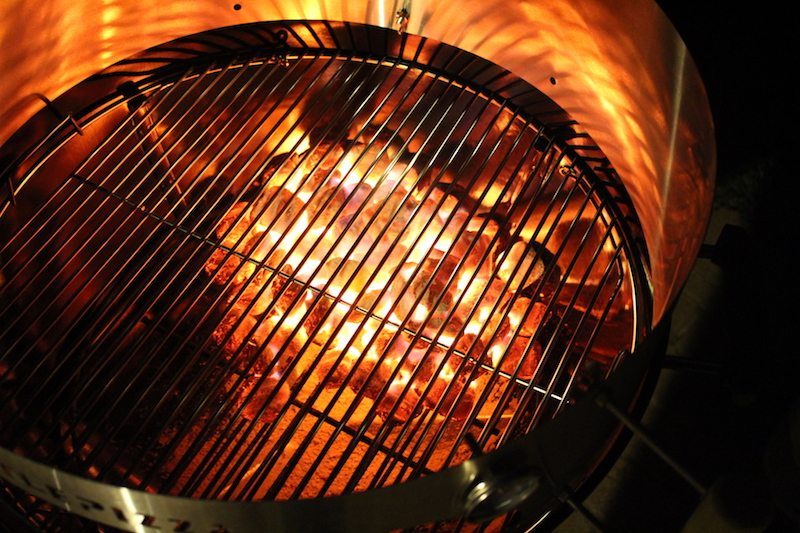
How To Cook Your Pizza On A Weber Grill (With Pictures!)
Here are 8 methods I discovered, each with their own advantages and challenges. Which ones have you tried, and were they a success? If not, what works for you?
Minimalist Approaches
Bare Grill Grates
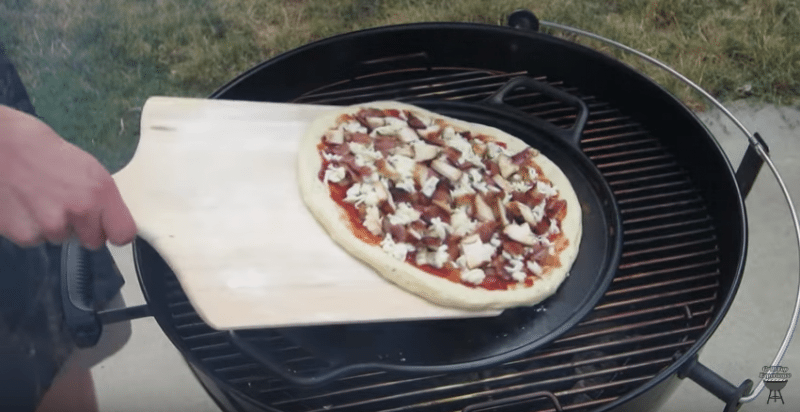
Surprisingly, you can grill a pizza right on the Weber grill grates. Just make sure the dough is thick enough that it doesn’t fall through! But just like with making pizza on gas grills, most of the time you’ll be alright. The grates get pretty hot, so your dough will get nice and crispy on one side first.
After that side crisps, flip the dough over to cook on the other side. From there, you can add your sauce, cheese, and toppings. My suggestion is to have your toppings already cooked unless you’re heating them up. For example, raw bacon won’t fully cook this way. But something like pepperoni is fine, since it doesn’t need to be heated to be edible.
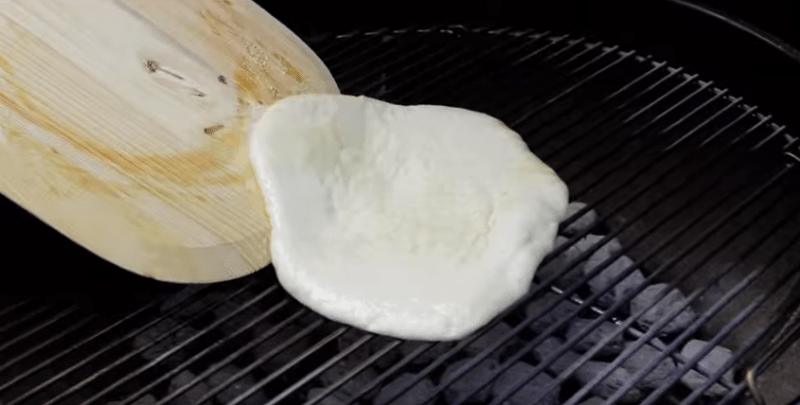
As you can see from the image above, spread the coals thin on the bottom of the grill so your pizza cooks evenly, and the temperature isn’t too hot. We don’t want to burn the crust! You could also push the coals to one side and put the lid on to use ambient heat temperature to cook rather than direct heat from the coals. Both methods are effective!
Cordierite Pizza Stone
One step up from requiring no preparation, as shown above, is to get yourself a grill-safe pizza stone. Not all stones were made for the direct heat or high temperatures of grills, so be sure to get a pizza stone that’s grill approved.
If you’re using a pizza stone, heat it up slowly! I would place it on the grill with the lid off first. Let it heat up a bit, then place the lid on to get it fully heated. Flick some water on it when you think it’s ready to cook. If the water forms a ball and rolls around, then you’re ready to go.
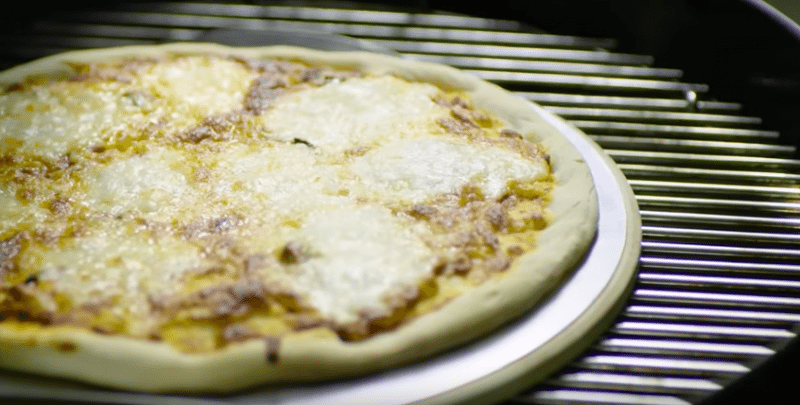
One trick to try, if you’re using a pizza peel and fresh dough, is to sprinkle a little bit of cornflour onto the peel. It will burn a bit on the pizza stone, but the burning won’t affect the flavor of the pizza. This approach will make it much easier to get the pizza from the peel to the stone. You’ll also lose fewer ingredients as well as have less of a risk of dropping cheese crumbs on your stone. Cheese immediately melts onto the stone and will turn it black.
Black spots on your stone are quite common, but I prefer to avoid them!
Metal Pizza Pan Or Other Grilling Pan
There’s not much to say about this one since it’s quite similar to the pizza stone method, but you do need to prep your pan a bit differently! Depending on what type of pan you’re using, you can also arrange your coals differently. If you’re using an aluminum pizza baking pan made for the indoor oven, you may want to cover it in foil first and use nonstick spray to prevent the dough from sticking to the foil.
You may also want to arrange your coals on the sides of the grill to prevent excessive direct heat onto a pan that wasn’t made for the grill. You’ll probably ruin the pan anyway, so we’ll just make that the pizza grillin’ pan from now on LOL.
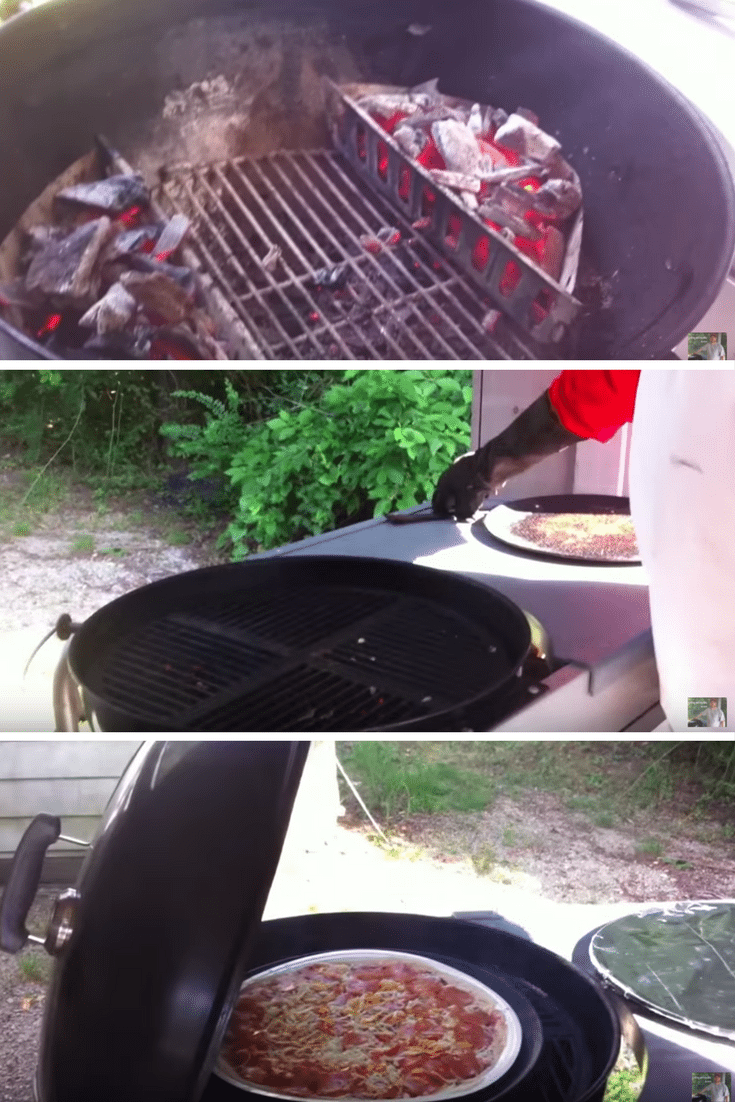
Alternatively, you could use a cast iron pizza pan with your Weber grill and have some lovely tasting pizza too! With this type of pan, you may want to preheat it and season it with olive oil first before putting your dough down. I think this is a better long term method of making your pizza on a grill since the pan will likely last longer and you can use it for other things as well. Cast iron is very sturdy material and great for many camping situations.
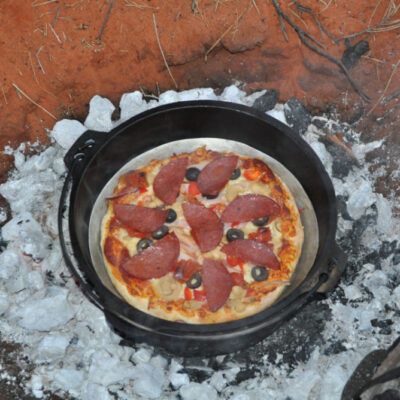
You could even toss it over a fire in direct flames and cook your pizza that way, like a true mountain man (or woman).
Fire Bricks
This method is very easy to set up and may change the type of pizza that you make. The creators of this method claim that they use this to make a “New York Style” pizza as opposed to Neapolitan style pizza. The difference would be the cooking temperature and distance from the flame.
With an extra large pizza perched above the coals, your pizza will cook slower, but more evenly. You’ll have the same temperature coming from the top and bottom of the grill, rather than extra heat coming from the bottom. I imagine that’ll produce big floppy pizza slices just like in New York!
The Neapolitan style pizza is what you typically find with wood-fired pizza ovens that cook with direct heat of 700ºF – 1000ºF and cook in about 1-2 minutes. Their crusts are chewier, thinner, and crispier.
To get this method going, just place some fire bricks over your Weber grill and then lay the pizza pan with parchment paper on top of those bricks.
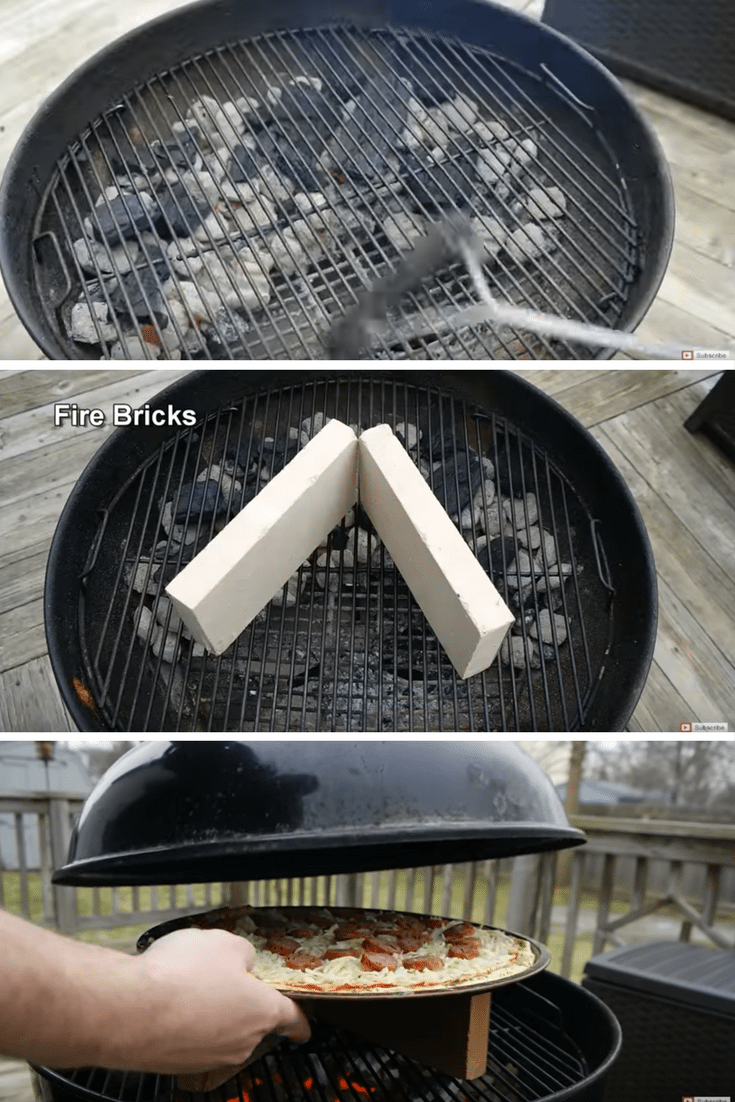
I imagine the extra heat on top will also cook your ingredients more. You can see from the video below that those sausages cook up pretty well even though they look like they were not precooked! Cook time is about 20 minutes including a break and turn at around the 15 minute mark.
Campfire Style
Skillet Pizza
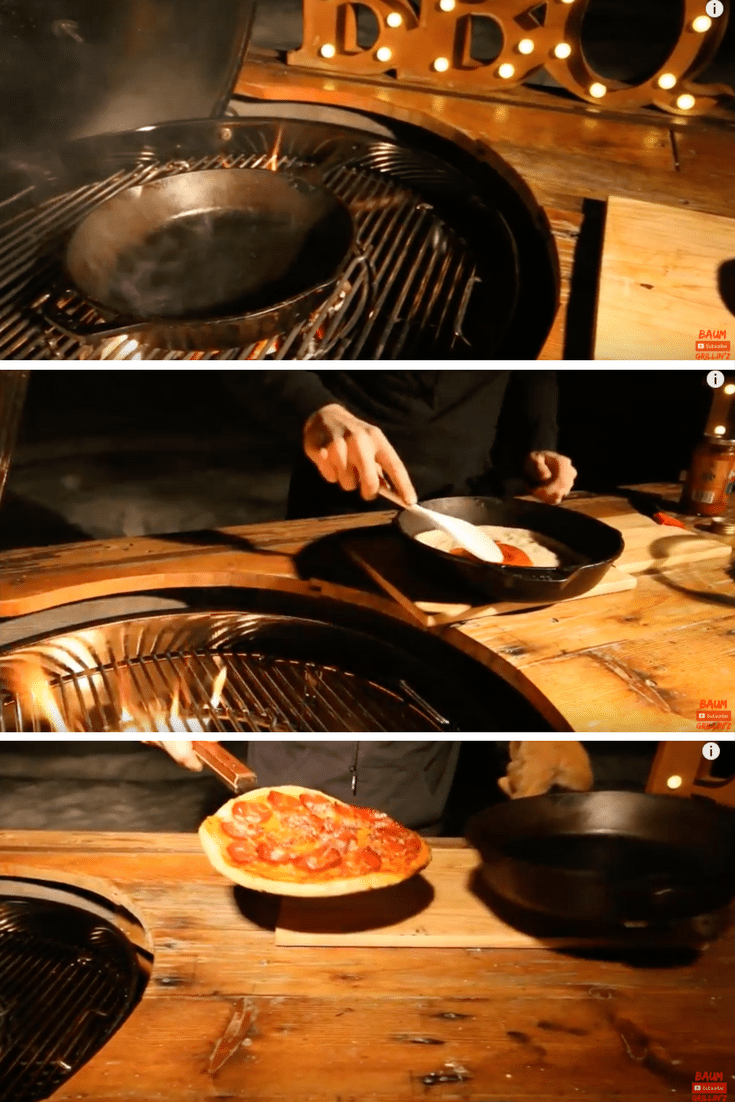
Kind of like the cast iron pizza pan from above, but even more “campfire style” is the pizza skillet. I’m looking to develop my own skillet pizza recipe, so look forward to that! But for now, the concept is pretty simple.
- Preheat your skillet over your Weber coal grill
- Season the skillet with olive oil or other nonstick grease
- Place the dough in your skillet carefully!
- Add sauce and toppings
- Place back on grill and close the lid
I think this is a really cool method of cooking pizza on your charcoal grill because it opens the door to making things like thick crust pizza, deep dish pizza, stuffed crust pizza, and other “thick” pizza dishes. How about a pizza pot pie, a skillet calzone, or pizza lasagna? With taller walls on the side of your cast iron skillet you can really get creative with your campfire pizza dishes.
Weber Grill Inserts (True Pizza Oven Results!)
These grill inserts made specifically for round charcoal grills take your pizza making to the next level. I talk about Weber grills because they have become synonymous with this style of grilling, but any 18.5 or 22.5 inch round charcoal grill will be able to use these inserts. They are made to fit both the large and small sizes. In fact, you can buy an extension if you have a larger 27 inch grill (26.75 exactly).
The reason these inserts work so well for making authentic pizza is that 1) They use wood and 2) They allow you to reach a hotter temperature. Because you don’t need to remove the lid to insert the pizza, you can get up to around 800º and keep it that temperature even while cooking multiple pizzas in one go!
The downside to these accessories is that you have to feed your grill plenty of wood to maintain that temperature. I was able to cook about 2-3 pizzas per wood burning session. I guess most folks won’t cook more than that, but considering I’m doing a bunch of testing on these, I had to use a whole bag of apple wood chunks. That can get a bit pricey if you are buying them from the store like me, but maybe you have a source of good wood to burn that’ll cut down on the cost.
KettlePizza
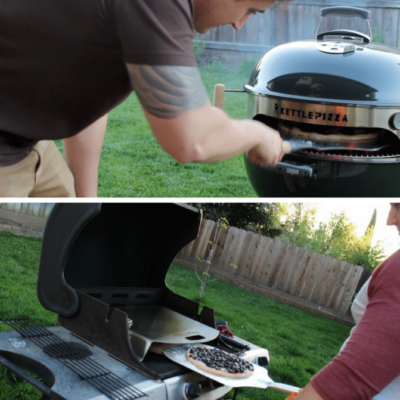
KettlePizza is the “name brand” of the bunch, so it’s the first one I bought and tested. I’m still in the testing phase, but was able to get my grill up to over 750 degrees within 10-15 minutes.
Just place your grilling grate inside the center of the KettlePizza insert. Once your coals are lit and your wood is on top of that, you can put the KettlePizza unit on top, then the lid on top of that. Oh, and don’t forget your pizza stone. That should be piping hot before placing your pizza on it or it will stick!
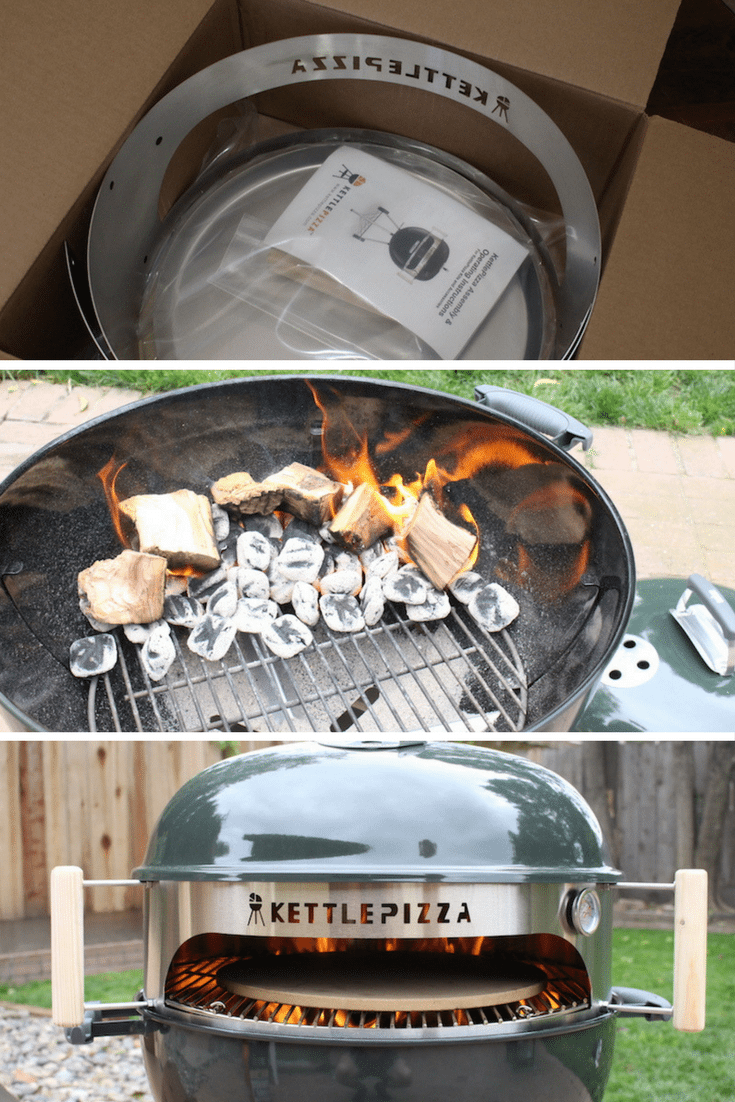
The cool thing about KettlePizza that other brands don’t have is a set of handles. What are those for? Well, at least in my experience, it meant I was able to refuel easily. I could turn the entire unit to the side-grates that flip up to add more coal briquettes and wood. Once the temperature starts to drop, the only way to get it back up is to add more fuel.
You’ll need a stone and peel with this unit. You can buy the standalone KettlePizza insert, or the combo that includes a pizza stone and pizza peel. This is a good deal because not all stones are made for the grill, so getting KettlePizza’s for-the-grill stone is a good idea. Any aluminum peel is probably fine, but from the high quality material of the insert, I assume the peel is of similar quality.
I purchased the standalone unit because I had a stone and peel already, so you can purchase them separately if you want to find a specific brand you like. Here is the complete KettlePizza charcoal review, including images of pizzas I made, and a comparison to similar products (some of which you’ll see below!).
Oh, and they also make an insert for gas grills too. I actually prefer that one because it doesn’t involve messy coal or buying extra wood chunks. However, it doesn’t have that same “wood fired” pizza effect since there’s no smoke being produced.
I guess most people will just buy the one for the type of grill they have, but if you have both, consider reading my review (linked above) to see which on you think would be better for you.
PizzaQue Deluxe Kettle Grill Kit
The PizzaQue Deluxe Kettle Grill Kit truly is a “kit”. It comes with the Weber grill insert, a pizza peel, a pizza stone intended for grill use, and a charcoal fence. The “fence” is not necessary, but as you can see from the images below, it keep the coals from directly heating the bottom of the pizza. This is how traditional wood fired pizza ovens work. The fire is started in the oven, then pushed to the back of the oven as the fire from the wood dies down and turns into mega hot coals.
It also means you can load up on coals and wood to get 800ºF+ temperatures. One commenter said they measured over 1000ºF! That’s pretty damn hot.
As I found out using my own KettlePizza, it’s quite easy to run out of fuel for the grill with just 1-2 pies, so loading up with extra coals and wood may be necessary. You can also put less, then reload later with the way the PizzaQue is designed.
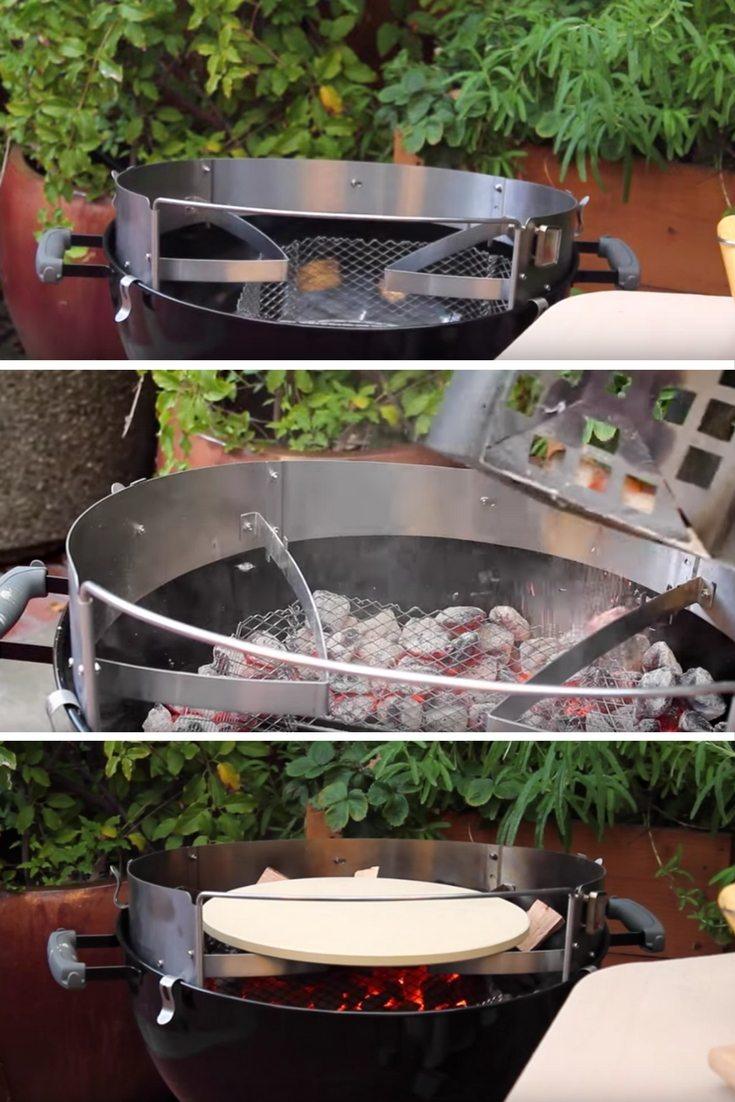
There are some advantages and disadvantages to the design of the PizzaQue, which is a little different than the KettlePizza on the inside (even though the outside looks similar).
First, you do not need the grilling grates that come with the Weber grill. There are two metal supports (triangle shaped) that will hold up your pizza stone. With the charcoal fence that’s included in your kit, it’s quite easy to refuel. Simply remove the lid, add more coals or wood chunks, then replace the lid. With the KettlePizza I needed to lift up the side “gates” in the grill to add coal or wood.
The PizzaQue also sits in a slightly different position than the KettlePizza. It rests on clips on the device itself, rather than the brackets inside the Weber grill. You can see that in the image above. This means the unit sits higher. But it’s also got a lower profile. The stone also sits higher in the oven. I’m not sure how this changes the airflow or cooking results, but it’s worth noting.
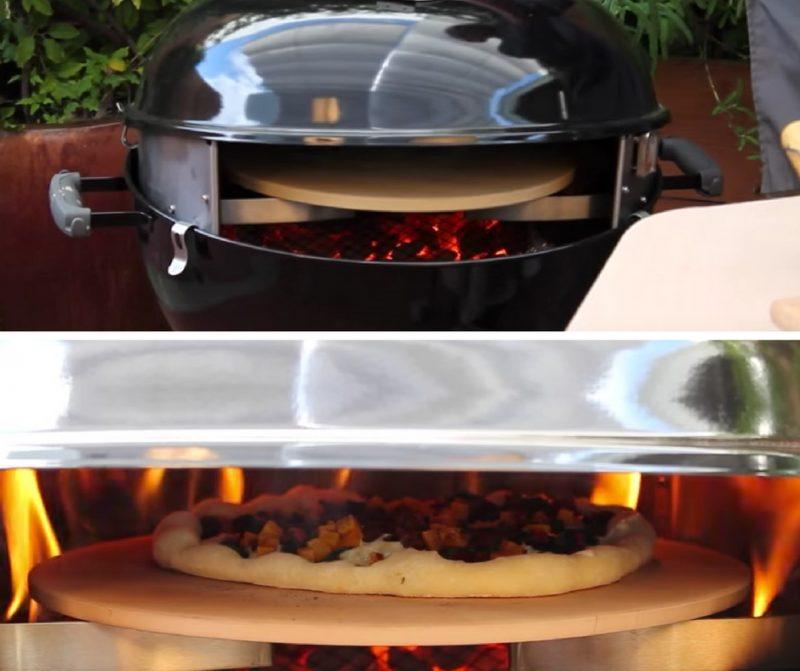
One disadvantage to this design is that your pizza stone does not have the full support of the charcoal grill grate. There have been many times where I’ve accidentally moved the stone by hitting it with my pizza peel. Sometimes the pizzas stick to the peel, so you really have to shake the dough off. With the design of PizzaQue, it’s possible to push the stone so it’s not stable on the PizzaQue support brackets.
A major selling point of this brand though, is the price. It’s significantly cheaper than KettlePizza, plus it includes the stone and peel. The included charcoal fence is also a big bonus because it seems like you can get a real raging inferno in your grill without worrying about burning your pizza stone or pizza. Many of you may have charcoal bins for the sides of your grill that produce a similar effect already.
Which do I prefer – KettlePizza or PizzaQue? Personally, I prefer the made-in-the USA quality and design of KettlePizza. It comes at a premium price, but there’s a reason for that! However, PizzaQue makes an awesome product that makes it easy to get started cooking wood-fired outdoor pizzas very inexpensively.
OnlyFire Pizza Oven Kit
Yet another brand of “insert” that will transform your Weber charcoal grill into a pizza oven is called “OnlyFire”. This particular brand is currently cheaper than KettlePizza, but more expensive than PizzaQue. Keep in mind that prices may change since this review was written.
One interesting difference between this brand and the other two listed on this page is that the device actually rests on the outside of your Weber grill instead of fitting on the inside. I don’t think this adds any functionality to the device, but it’s just an interesting difference.
OnlyFire doesn’t seem to sell as well as the other two brands on this page. It doesn’t have as many reviews online, and there are fewer blogs and YouTube videos featuring reviews about it as well. One issue that many buyers ran into initially is that the pizza stone sat below the mouth of the OnlyFire kit, making it nearly impossible to get the pizza out due to the angle of your pizza peel. They remedied this with little brackets they call “chips” that you can see in the first image below.
While this is a nice fix, and it seems to work now, it’s another (4) part(s) you have to keep track of.
Another downside is that it only fits the 22.5 inch grills. This is the standard size most grill owners get, but both PizzaQue and KettlePizza can fit on the 18.5 inch grill. KettlePizza even makes an expansion for the extra large 27 inch grills.

One last thing to mention that could use improvement here is that the handles are made of metal. That means they’ll be very hot while cooking, so you need oven mitts or barbecue gloves to move them around. If you set yourself up right in the beginning, you won’t have to move the OnlyFire device. But the wooden handles of the KettlePizza (also placed further away from the fire) are much more convenient.
In all, this isn’t really a device I’d recommend. Compared with the KettlePizza which is my #1 choice, and the PizzaQue which sells at a big discount, this model doesn’t have a major quality which makes it stand out.
Which method do you think you’ll use this summer? Do you have a different way to make pizza on your charcoal grill? Let us know in the comment section!
Grilling Safety Tips
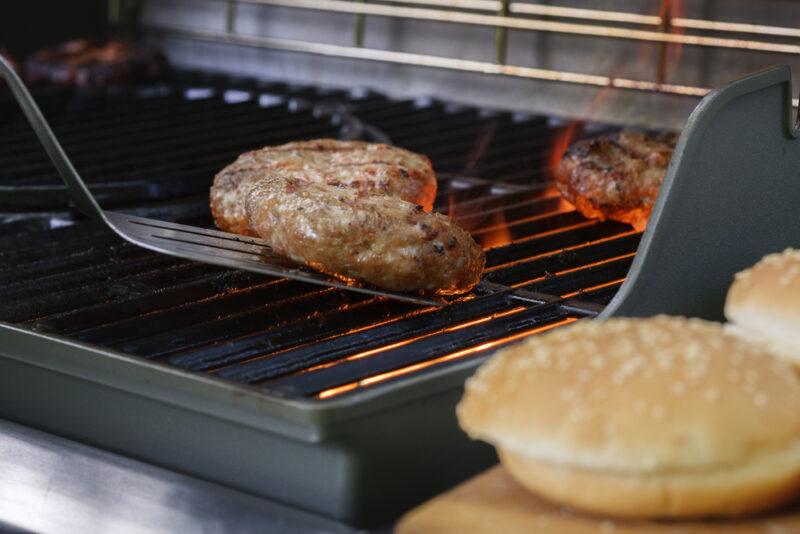
Whether you’re using a charcoal grill for making pizza or for regular grilling, there are some important safety approaches that you need to follow.
Only Use Grills Outdoors
Charcoal grills should only be used outdoors and in well-ventilated areas. The ventilation is crucial, as charcoal produces carbon monoxide until it is fully extinguished. Not only is this gas dangerous, but it’s also odorless and colorless, so you may be completely unaware that you’re inhaling it.
When you grill outdoors, the carbon monoxide can’t accumulate to dangerous levels. Also, because carbon monoxide production takes a while to stop, it’s important to avoid moving coals indoors soon after you’ve finished cooking.
Watch Out For Flammable Objects
Be careful about anything near your grill that might catch fire or be damaged by heat. This includes being cautious about placing your grill too close to a railing, as the grill can heat the wood and quickly lead to a fire.
This is one reason to be ultra cautious about placing grills on apartment balconies.
This issue doesn’t just apply to stationary objects either. It’s also important to be aware of anything that might blow onto the grill and also the clothing you’re wearing.
Make Sure The Surface Is Flat
Grilling on an uneven surface is never wise. Doing this increases the risk of the grill tipping over, which can be incredibly dangerous.
While you’re at it, watch out for any trip hazards in the area. Those are never fun and you certainly don’t want anyone to be tripping into the grill.
Have A Fire Extinguisher Handy
Accidents happen, even if you’re an expert griller and take every precaution you can imagine. Because of this, it’s important to always have a way to quickly put out fires.
A fire extinguisher is your most powerful tool here. Just make sure to check it regularly, so you know it’s going to work when you need it to. It’s worth having water close at hand as well, in case anything goes wrong with the fire extinguisher. Better safe than sorry, right?
Clean The Grill After Use
It’s a pain, but cleaning the grill is a wise health and safety practice. If you skip on the cleaning, then grease can easily build up and may catch on fire when the grill is being used.
The best approach is to simply clean the grill after every single use. This way you know there’s nothing to worry about.
Follow Food Safety Steps
While grills operate at a very high temperature, it’s still important to follow basic food safety practices. This includes washing your hands regularly and making sure that raw meat and cooked meat don’t touch.
Using a food thermometer is important too, as some pieces of meat may look cooked when they’re not. The thermometer helps you to be confident that everything is safe to eat. Remember that food should be put in the fridge within two hours of cooking. If it’s more than 90°F, then you should be aiming for just one hour instead.











 Which Red Wines Have The Least Tannins?
this was very interesting and helpful, thanks!!
Why you don’t turn the pizza half way trough?
Very informative and some great Weber grill ideas on cooking pizza, so the crust does not burn. Thank you!